the faithful steed…….

Day 12 – Busan, South Korea

In my opening two posts, I talked about the why and I talked about the where. Now that all the other crazy stuff is behind us and the bike and I are now reunited, I reckon it’s time to talk about the how. The faithful steed. My two wheeled obsession. The petrol powered stress reliever. (that somehow sounded dirty) Those of you who ride are already nodding your heads in understanding. Those of you who don’t, you really should. Life would be so much simpler if everyone rode motorcycles, don’t you think? When was the last time you saw a motorcycle parked outside a psychologists office? The only stress we would encounter is wondering how far that next service station is or if you should switch to reserve. Or hoping you beat the rain home.

My passion for balance-based motorised transport bloomed quite late in life. I’ve always been interested in mechanical things. A bit of a heartland motoring enthusiast, you’d say. I still own my first car, I’ve had it for 23 years now, others have come and gone since but this one will stay with me forever, I worked in the automotive industry for over 10 years, most of those as a mechanic. My allegiance to automotive marques and styles wavered over the years but they were always firmly entrenched with four wheels. I didn’t grow up riding dirt bikes as a kid. The lure of death-defying speed on two wheels fuelled by fresh licenced bravado wasn’t there as a 20 year old. I was happy modifying and personalising my own metal box you sat in.

A career change in 2009 began the change in thinking however. I started working with a whole new group of people with a variety of automotive passions, both two wheeled and four. This and the realisation that it was a lot easier and faster to customise and build a bike and you can fit 4 bikes in the space a car takes up at home. So I bought my first bike, an old Suzuki GR650, off eBay in 2010 and started playing around with it and I was hooked pretty quickly.

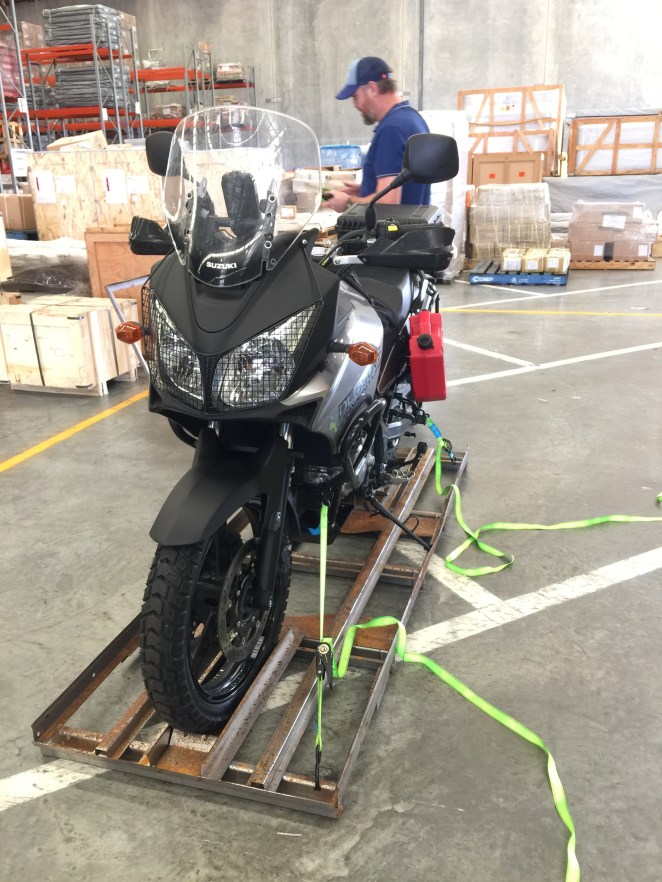
Fast forward to 2014 and with prompting from my wife, an understanding bank manager and an impending 40th birthday, I bought my 2008 Suzuki DL650A Vstrom. I chose this bike mainly due to good reviews at the time and within a reasonable price range for what you get. For the uninitiated, the Vstrom is sometimes referred to as a Dual Sport bike or a bike that is not a pure road bike but not built to be an off-road machine either. With its sweet fuel injected 650cc V-Twin engine and 6 speed gearbox, these thing gobble up the miles on the highway with ease while delivering great fuel economy. This and the comfy seat and upright position make it a great way to see a lot of the country while enjoying the outdoors on road. It’s capable off road with the right mods but when I say off road think dirt roads and fire trails more than Dakar-esque sand dunes or the jungle single tracks of the Amazon. A more apt description then I suppose is Adventure Tourer (if it needs a label). A bike that can to take you most places around the world from the smooth motorways of Europe to the graded dirt highways of Alaska.

So I buy this bike back in 2014 and it already had some worthy touring mods and additions like hard luggage and top box, GPS and bigger front screen. There were a few extra things it needed before I took my first trip down south through NSW. Being the resourceful chap that I am, I made a bash plate for the bottom of the bike, a mesh headlight guard and radiator guard. As many Vstrom owners know, the positioning of the oil filter at the front of the engine makes running on dirt roads a precarious proposition without some sort of protection. IMG_6871As for the headlight guard, you don’t hear of many Vstrom headlights being broken by a stray rock but I’d hate to think what they’re worth to replace. Plus the mesh guard looks cool.


After I returned from my first bike holiday, the V took up commuting duties while I slowly made small improvements when funds allowed. These all followed the same basic idea of making the bike more adventure worthy.

You’ll notice a common thread as you read on throughout this blog regarding cost savings and making stuff. Those of you into Adventure Touring will agree that most bikes aren’t perfect straight off the showroom floor and companies like Touratech survive quite well on the need for us all to want the best (and coolest) additional accessories. If one so choses, he (or she) can double the value of their steed with a catalogue full of trinkets and add-ons. Cool if you can afford it.

I’ve had some requests from Vstrom guys to list down the mods and accessories I’ve decided are required to ensure safe and reliable passage to the other side of the world.

Starting from the ground up, I’ve chosen the Motoz Tractionator GPS tyres to get me through the first half of the journey. Prior to these I ran Heidenau K60’s which I found to be a great tyre, albeit on the high end of the pricepoint. Aggressive enough to give you confidence off road but still with some quite good road manners. IMG_8047I put almost 15k kms on these K60’s before swapping out to the GPS’s but if I wasn’t taking off on this trip, I’m confident I could have got a few more thousand k’s out of them before they needed changing. I chose to go with the GPS’s mainly due to some great reviews, with many riders comparing them as equals to the K60’s with similar mileage. They’re also an Aussie owned company so it’s nice to support local brands. Oh, and they’re cheaper. This trip will most certainly require another change in boots before arriving in the UK but I’ve decided to wait and see when instead of carrying another set from home. If I can make the GPS’s last til Moscow, I’ll consider running a more road oriented tyres to hit Scandinavia with.

To protect the bike from the inevitable falls through the off road sections of the journey, I’ve gone with SW Motech crashbars and Barkbusters Jet hand guards. I’ve recently modified the aforementioned home made bash plate to tie into the crashbars for a sturdier mounting.

On the comfort/ ergonomics front, I’ve changed out the stock bars for ProTaper SE ATV Hi bars, a popular option for Strommers. SW Motech 1” risers secure these to the bike to make it more comfortable in a standing position along with Pivot Pegz footpegs mounted to 1” lower peg mounts. IMG_8053Along with some shorter dog bones in the rear suspension link, these all come together to make the bike a lot more comfortable for someone pushing 6’3”. Some Oxford Heated Grips round out the controls to help out on those chilly mountain passes. These were one of those ‘deals too good to be true’ moments, picking them up on ebay for about $30 (when they run to about $140 new) with the promise of ‘only used for one trip’. Yeah, not so much. Looking slightly worse for wear, setup for an quad with the sleeve glued into the RH grip and a couple of cooked chips in the controller, these grips had only one setting (Nuclear) when hooked up to power and could not be switched off. So the solution came with a waterproof, backlit rocker switch and the orginal controller tucked up under the cowl. Just have to remember not to leave them on. An Airhawk seat pad looks after the only other part of my body attached the bike.

I haven’t done much to the mechanical side of things apart from an Akrapovic exhaust, another awesome deal second hand. Running at over $1000 to buy new, this pipe woke up the bike and gave the exhaust the note it was meant to have. Almost Ducati-esque in my opinion.

IMG_6784Everything else mechanical was done recently as part of a major service. Chain and sprockets, filters, oil, spark plugs, valve clearance check (all in spec luckily), fresh oil in the forks, brake pads front and rear, new battery and a good check over of everything else.


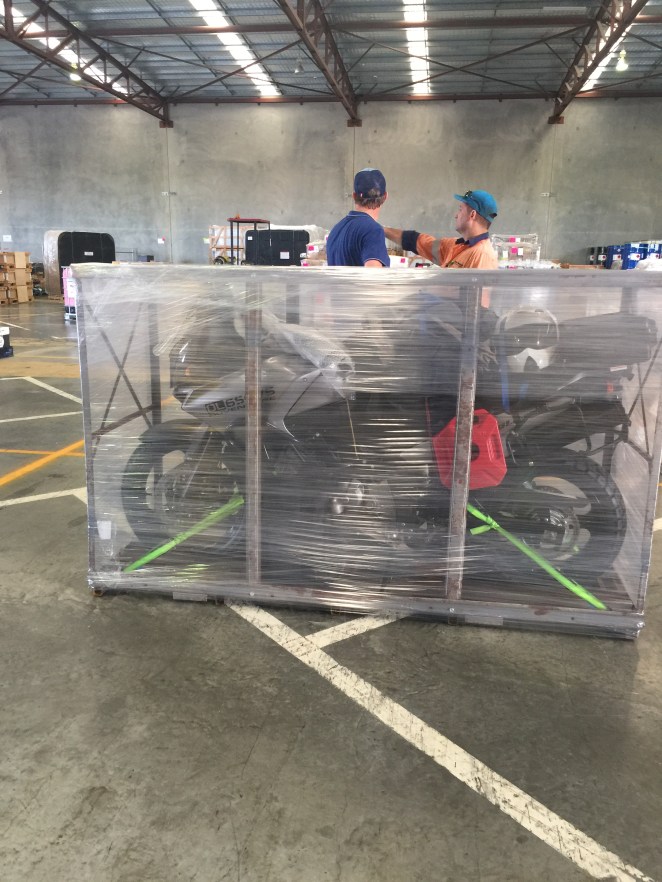
So there you have it, not a huge amount of changes to go half way round the world but enough in the right places to make it comfortable, safe and protected. If you see anything on the bike I’ve forgotten to mention here, drop me a line in the comments.

the wait…..

Day 11 – Busan, South Korea

In my last post I mentioned some stresses currently with regards to my bike so this time I’d thought I’d explain a little more. Let’s go back maybe a year or so when I first contacted Bikes Abroad, a company in Australia that facilitates exactly that, getting bikes overseas. I found their details through my months of researching which came with many recommendations from fellow travellers using their services. Communication was great with Ivan throughout the ensuing months and as the leave date got closer, everything seemed to run smoothly. He gave me some options as to which ship to use for the journey depending on my timetable and we decided the ANL Warrnambool would suit our needs.  A 249m container ship sailing under the German flag, she’s not a pretty vessel but I’m sure she’s got plenty of nautical miles under her belt since the wife of some CEO of a ship building company broke a bottle of champagne across her bow back in 2009.

So with the booking in place, the only thing left to do was get the bike crated up and prepped for its 26 (give or take) days on the water, sailing from Brisbane to Singapore then onto Busan. I was able to luck onto grabbing a steel crate from the local Suzuki dealer for free. I think it may have been for a large cruiser-style bike as the length and width were right but I had to extend the uprights another 130mm for the height of my bike. I was working to a certain cubic capacity as that’s what shipping rates are calculated on and Ivan had given me quotes based on 2.6cu.m. At this dimension all I had to do was remove the screen and unbolt the handlebars to turn them sideways as with full width bars and Barkbusters, they were a bit too wide. I could however leave the front wheel on which is a bonus. Some others choose remove it to reduce the size but its a bit awkward due to the weight to get it back on by yourself. One less thing to worry about. So we delivered the bike to the shippers facility after I rode it over there with my wife Trina following in the car with the crate on the roof racks and the luggage in the back and packed it all up one last time for it to be loaded and set sail on the 8th April.

IMG_8085IMG_8075IMG_8081

Fast forward to last week. It was my second day in Japan and I was checking in on the progress of this ship thinking how close it would be to arriving in Busan. I’d been using the Vessel Finder website which tracks any and all commercial ships all around the world the last week or two to follow it on its journey. The last time I looked which was around the 20th April, it had just left Singapore as scheduled and, as I’d thought at the time, was continuing on its journey to Busan. When I checked on the 2nd May, it was showing as sitting back at Port of Brisbane preparing for its next sailing to NZ.

Huh? Hang on. Wait, what? OK, so that didn’t make sense. What happened to Busan? Was there a problem with the ship? But more importantly, where’s my bike? All these questions were running through my head along with scenarios of what would happen next. I emailed Ivan straight away to check in but understandably would not know an answer straight away. As the days went on not knowing, the anxiety levels were rising and Ivan hadn’t gotten an answer either. To make matters worse, I’d picked up a bad cold along the way due to probably running myself ragged, not eating properly, the flight over or a combination of all 3. So Friday comes and still no word from Ivan. I assumed I’m not going to hear anything over the weekend either so resigned myself to continue with the plan, get the ferry to Busan and hopefully Monday I’ll hear something. Monday comes, ferry ride is done and I check my emails every chance I get. Luckily free wifi in Korea is in abundance it seems. By 3pm I hadn’t seen anything so decided to call Ivan back in Australia hoping he had some news for me. Which he didn’t but was confident by the end of the day of Tuesday he would hear back from his contact at the shipping agency. He’d forwarded on my email from last week to chase the info up and when he himself hadn’t heard anything by Friday, he had to harass them again. See where this is going? Ask a question to one person, they have to ask the next, then the next and so on. It all takes time.

So to assure I get any communication as it comes in, I confine myself to the guesthouse in Busan. Luckily its an awesome spot with all the wifi I can use. I’ve been the lone boarder since I arrived so I have just been extending my stay each day until I can leave on two wheels. Then Tuesday I finally get the confirmation I was waiting for. My bike did in fact change ships in Singapore and was aboard the KMTC Shenzhen and was due to arrive in Busan that day. Hooray! Technically 6 days later then we had all planned but confirmation it wasn’t lost or sent back to Australia was good enough for me!! Now the wait began to see how long it takes to be made available. I assumed nothing would happen until Thursday at the earliest as it would’ve needed to be unloaded, move from warehouse to warehouse and so on which was cutting it tight as I need to be half way up the east coast first thing Sunday morning to catch the once a week ferry to Vladivostok.

Thankfully, I received an email from Wendy, my shipping broker yesterday saying I needed to go to the Customs office today (Thursday) to start clearing the bike through customs. Hopefully that means I can ride it back here to the guesthouse this afternoon and we can get this adventure going proper.

So that, dear reader, was the additional grief I had been having with the bike shipping. I’m sure to all involved, it was just the normal thing that happens all the time and in the big scheme of things, I’ve maybe lost 2 days? of riding in South Korea. It’s just the additional grey hairs and ulcer I didn’t need!


technology fail…….

(in the land of technology)

Day 8 – Busan, South Korea – 8464km travelled, 0km on two wheels

Well, today I left Japan bound for South Korea. In some ways, I feel it’s gone way too quick and I want to stay longer to see so much more of this beautiful country. Yet on the other hand, my days have been so full on that it feels a lot longer than 7 days since I kissed my wife and kids goodbye. I’m currently travelling on the JR Kyushu Beetle ferry across the Korea Strait so I thought with about 3 hours to kill I’d finally get the opportunity to try and get everything in my head into some sort of written word.

I’ll start off saying that my intention was to update this blog way more often (and still is) but as the title of this post suggests, my laptop decided it didn’t take too kindly to me plugging in a non-proprietary USB device (i.e not Apple) into one of its slots and proceeded to shut down on me on day 3. I mean dead, nothing. No light on the charger, no response to any trick. Like a dead flat battery but plugging in the charger doesn’t work. I know the battery’s got charge in it. I was just using it. Having this happen 3 days into a 5 month world adventure is not really what I needed! So the hunt was now on to find the solution. Thoughts of a fried motherboard and an expensive trip to a foreign Genius Bar scared me. I also didn’t want this to eat into valuable time I had while I was in Japan. So I decided to turn my back on it and shove it the corner so it could have a good hard look at its behaviour for 2 days.

I know full well dear reader, that this is a highly dubious form of high tech computer repair but I couldn’t exactly use the ‘turn it off and turn it back on again’ fix now could I?

During my frantic researching on possible fixes that fateful night, it was apparent there was actually a fix that may be the equivalent of the classic IT No-Help Desk suggestion. Although not officially made known by Apple, there seemed to be more than 1 forum poster who has succumbed to the same fate and had success with unplugging and plugging in the battery. It was the best lead I’d had so it was worth a shot. All I needed to do was to find somewhere that sold the tiny screwdrivers to remove the back off the laptop. Now where am I going to find an electronics store in Japan?

The fact you are now reading this kinda gives away the fact that this trick was a success. A huge weight off my mind. For those interested, it sounds like it has something to do with the order you plug things into a MacBook Pro if its not a Apple product. If you didn’t know like me, now you do. If you did know, thanks for the heads up, jerks.

So now I can get back to sharing my experiences as they happen. Rather than think back at what happened 5 days ago and have to park up for a day or two to write a behemoth post that no-one would have time to read anyway, I think I’ll start off from today and every so often I’ll add in a bit into my posts about my memories of Japan.

So today, what happened today? Ah yes, of course. South Korea. I said goodbye to the Land of the Rising Sun in Fukuoka on the island of Kyushu. I didn’t get to see much of where I’d stayed in Hakata unfortunately as I had arrived around 4pm and had to be at the ferry terminal by 7:30am the next day. I did enjoy the palm trees down the centre of one of the main streets though. Very Miami. There was also a particular subway station that caught my attention that I had to record for posterity and use when ever the need arises to tell someone what to do.

fullsizeoutput_28b                               IMG_8846

The JR Kyushu Beetle ferry is a jet powered hydrofoil that can cover the 200 odd kms across the Korea Strait in around 3 hours. It an interesting old tub, little bit daggy around the edges, windows needed a good clean but it was comfortable and smooth for something that big crossing open water. It essentially just feels like being in a plane on a bumpy flight and that constant jet roar all around. It was relatively cheap too, I think. A one way ticket was about 8400yen which equates to a bit over AUD100. Another first for this trip occurred today too. First time crossing an International Border without using a plane. Might not sound like a thing to you international readers but my fellow Australian travellers will know what I mean.

So Busan is where I am reunited with by bike which should be tomorrow and the main part of this adventure can begin. Those of you following my exploits daily on social media will know that this process is the part giving me the most grief at the moment but I’ll leave that diatribe for the next post.

Stay tuned.

the time has come….

Day 1 – Coolangatta to Tokyo – 7220kms

Well, today’s the day. The culmination of 18 months of planning is upon us. By the time you read this, I’ll have landed in Tokyo for the first part of the great adventure. A few things have changed since I first convinced myself I could do this but this first part has stayed the same. I’ve started here in Tokyo and will spend the first 7 days exploring the southern part of Honshu, the largest of the 4 main islands of Japan travelling down to Fukuoka on the island of Kyushu. This is going to be a more traditional backpacker type experience sans motorcycle until I catch the ferry from Hakata across to Busan, South Korea on the 8th.

Sitting in the departure lounge of the international terminal this morning I was filled with a weird kind of nervous anticipation. I usually find these times waiting to board at airports the most boring, each minute seeming like an hour and nothing much changing on Facebook since you last checked it 3 minutes ago. Today was different. Pretty easy to understand why I guess. I had said my somewhat tearful goodbyes to the family only minutes before, I’d messed up using the fancy electronic gate thingo at customs (helps if you insert your passport into the scanner on the right page, dummy) so had to go over to the counter to get my passport scanned again and have the friendly border security man give me that ‘is this guy dodgy?’ look. Sigh.

18221835_10155162892888913_7649924944802379731_n

So I find myself sitting wide-eyed and buzzing waiting for the call to board. There were plenty of others in the aforementioned zoned out state, reading, yawning, checking their phone or their watch but I couldn’t seem to keep still. I’m glad boarding was only delayed by 10mins or so.

This was my first time flying out of Coolangatta Airport (actually I think it’s called Gold Coast Airport but same same) so another thing to add to the list. This was also the longest flight by far I’ve been on, my international experiences limited a few skips across the ditch to NZ. A bit over 9 hrs to get to Tokyo direct so paying an extra 9 bucks for entertainment helped pass the time.

IMG_8217

I arrived at Narita airport a little after 7pm local time to a light drizzle. First job is to find an ATM and get some Yen. For those that don’t know, it’s currently about 72 yen to the Aust dollar so denominations are a lot larger. I took 40,000Y out of the ATM which is about $550 thinking that should go close to the budget for the duration. Bit of whirring and the familiar electronic chimes of all things Japanese and out spits 4 notes. 4x 10,000Y notes. It’s gonna take me a bit to get this right in my head I think. The hilarity came later on when I bought a bottle of water at a Family Mart to break a note. The equivalent of buying a packet of chewing gum with a hundred. But I digress. Back to Narita. After a bit of to-ing and fro-ing and a little help from other Aussies looking for the same thing, I found the Japan Rail (JR) office to exchange my Japan Rail Pass voucher for the actual pass. This is a pretty good way to get around Japan, only available to tourists and allows you to use about 90% of all JR trains and buses including the Shinkansen or Bullet train. It’s about an hour on the Narita Express train to get into Tokyo, then from there taking two more trains on short journeys to get me to my bed for night 1. All sounded pretty simple right? Remember when I said the Japan Rail Pass looks after most trains? Yeah, well the last one was different. I needed to jump on the Tsukuba Express for my last little train ride to Asakusa and needed a ticket. The young guy at the little booth at the gates just shook his head at my JR Pass and pointed back upstairs. Now, as you all know, when you’re in airports or heavy touristy areas, information is displayed in several different languages. Japan is no different. Easy to follow what I needed and where to go when leaving the airport. Obviously, once you get into the real world, it’s time to figure it out the hard way. Hence the need to be be one of ‘those guys’ breaking a big bill on something small to get change. I made my way to the bank of ticket machines with not a single English translation in sight. Knowing how much the ticket was by the board above the machines, I started pressing buttons and with some blind luck, my little stub dropped out of the machine. Win.

I’m now kicking back in my little capsule at the Khaosan Tokyo Samurai Hostel struggling to stay awake. I’ll tell you more about my capsule next time.


Today’s Top Tip – if you’re ever flying on a Boeing 787-8 with Jetstar (and quite possibly all the others using this same plane) seats 44 D,E and F are the go if you want the legroom without the extra cost. Row 44 is an exit row but only the 3 seats on the left and 3 on the right are classed as exit row seats (which they charge for). I was in 44D and its directly behind the bulkhead in the middle of the plane and I’ve easily got half a metre from my knees to the bulkhead. Nice.

IMG_8216